
By rendering the entire work area it meant that all elements were included.
I then needed to export my video as expressed in the assignment brief, by exporting I am creating one file that can be viewed by many different viewing programs, such as VLC or Windows Media Player without opening the project itself.
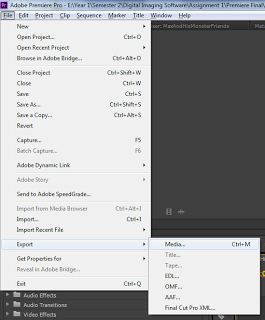
To export my film trailer I went to file > export > media.
Once here I can now export my file, with a choice of different options. The
export video format that is needed for the assignment is ‘QuickTime’, and with
the correct selection of the DV Pal Widescreen 48 kHz chosen when creating the
document I did not need to alter any settings.
Scale to fit also allows the film to fit to screen without stretches the clips and distorting them.
When having both the video and audio selected I can then progress to export.
The exported file will then save in the same destination as my assignment project as this is the source destination.
Scale to fit also allows the film to fit to screen without stretches the clips and distorting them.
When having both the video and audio selected I can then progress to export.
The exported file will then save in the same destination as my assignment project as this is the source destination.

No comments:
Post a Comment