I found a tutorial to follow to use as my DVD label. The link that I used is below:
http://vector.tutsplus.com/tutorials/illustration/vector-space-composition/
To begin I added a background to my template of a black background using the rectangle tool, and then used the gradient tool to go from green to black. The green halo will be used to make the planet stand out and glow, and so in turn the centre of the planet is the centre of the green gradient circle. I decided to place it in the centre of the DVD label.

I then used the ellipse tool to add a circle over this gradient, that I then filled with a gradient that went from dark green to black. By moving up and down the line I am able to alter how the gradient with the two colours appears.

I then added another circle over the top again, slightly larger, with a gradient that went from blue, white and black colours. The arrows on the gradient scale, and be added by double clicking, or removed by being dragged down off the scale.

I then used the ellipse tool again filled with a solid black colour. I used the selection tool to rotate the ellipse, and the handles shown below that allowed me to alter the shape of the object.

I then used the mesh tool found down the left hand side of the menu bar to draw a grid, I drew a grid 2 by 3, and so had 6 nodes. I was able to alter the lines of the grid by using the selection tool. I was then able to fill the nodes with colour, of which I used white.

I then selected the gradient mesh and and set the blending mode to multiply in the transparency panel.


I then grouped the planet object and copy and pasted it to make two planets. I then selected one of the planets and used the selection tool, and holding down the shift tool I was able to resize the planet object as a square and I then placed this where I wanted it in the bottom right of the disc.
I then altered the planet by Object > Transform > Reflect, to change where the glow on the second planet was placed.

I then also altered the angle of reflect.

I then Set the Blending Mode for this circle to Screen and reduced the Opacity to 60% in the Transparency panel. This changed the colour of the planet completely, I am not entirely sure why, but actually liked the effect that it gave.

I then began making the Saturn rings for the planet. I used the ellipse tool to create a circle, and then used the gradient tool. This gradient will consist of alternating black sliders and various shades of yellow.
I selected the rings and stretched the object to be oval rather than circle and then did Object > Transform > Rotate to alter the angle of the rings.
I selected the rings and stretched the object to be oval rather than circle and then did Object > Transform > Rotate to alter the angle of the rings.

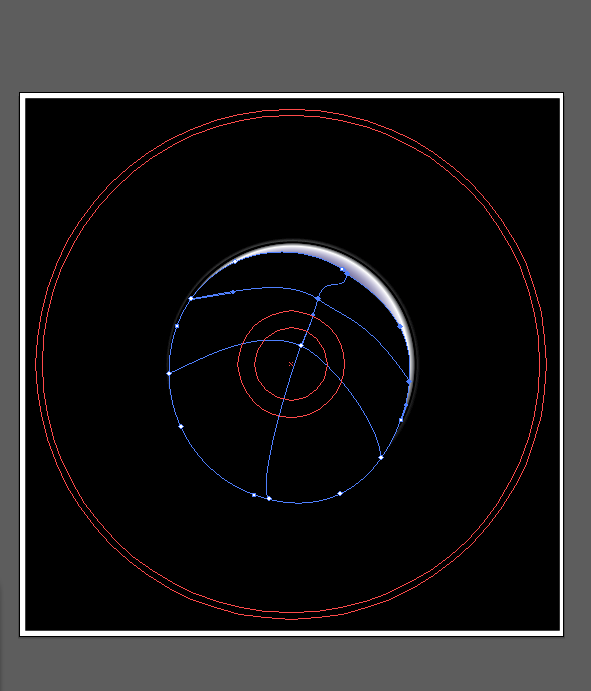
I then needed to hide the part of the Saturn rings that would hide behind the planet.
I had to create a circle, and using the Scissors Tool on the left, cut it at the at the bottom part of the inner rings and then remove the bottom part. I then had to use the pen tool to connect the two points, that then formed a semi - circle. The semi - circle shape that remained I then set to a gradient mode of black to white and then again alter the transparency mode and set it to multiply, which then allowed the colour underneath to shine through.

I then had to work on the background around the planet. I needed to add stars and planets to the background. I needed to create a circle and fill it with a radial gradient, then set the Screen Blending Mode. I did this using a blue colour.
I then created a new circle filled with a black to white radial gradient. Set the Screen Blending Mode and reduce the Opacity. I stretched the circle to make it a thin oval and copied the image to make two ovals.
I transformed and rotated one, and was then able to select them and make a cross.
I transformed and rotated one, and was then able to select them and make a cross.
I then grouped all the elements of the star and altered the size, I then dragged the object to the symbol section and saved it as a new character.

I also did this with the planet and named the symbols.
I was then able to use the symbol sprayed and spray the symbols on the background, so did not have to insert each symbol individually.
I was then able to use the symbol sprayed and spray the symbols on the background, so did not have to insert each symbol individually.
I then needed to add the text that appears around the edge of a DVD disc and so did this by drawing an ellipse around the disc where I wanted it to be and then used the type on a path tool, and was then able to type on the circle and could alter the size of the text, and could drag it round to position where the text starts.

I then needed to add all the generic images that go on a DVD, I did this by placing them into the document, from the Photoshop document.

The images I had already previously edited in Photoshop by using the magic wand tool and getting rid of the background, so I did not need to edit them here, instead just place them in and move them to where I wanted them.
I then needed to add the title to the label I used the text tool to type the title, and select the same text and colour that were are on the DVD cover to draw comparisons. I altered the text style to be arc, I then bent the text and distorted the text, and was able to make it look similar to that of the title text on my DVD cover.
When I'd made it look similar I then transformed the text to be able to rotate it and make it sit around the planet, similar to how the title sits around the moon in the cover.
No comments:
Post a Comment